There has been a bit of a hiatus as I wait for the rear uprights to have the pivot pins replaced. This has been a bit of a saga since they were stuck in the cast alloy uprights and in the end had to be drilled out. New pivot pins are being made of HT8 and should hopefully be fitted soon.
Whilst this was going on, I was a bit stuck in getting the chassis rolling so spent some time preparing bits of the bodywork and hood for refurbishing and following up on other parts that had been sent away for reconditioning.
First back was the brake master cylinder. This had been re-built by Past Parts of Bury St Edmonds and I had chosen the gold-plated option to give the engine bay a bit of bling. This looks the d’s b’s but I haven’t tested it yet – it’ll be a while before I get round to that!

The brake servo that Past Parts said could not be disassembled came back together with an identical 2nd hand one that they had sourced. Whilst they had tested this and certified it operational, the outside is not pristine so I thought I would still have the original one reconditioned at J&L. This has been sent off to them but no news to report yet.
Next up was the differential. I phoned round various places that came up on Google when searching for differential rebuild but quite a few were put off by reference to Salisbury diff. In the end I referred to it as a Jaguar 4HU and most were happy with that but I was more impressed with Tim at Central Axles in Birmingham who gave a much better impression of someone who knows what he’s talking about than any of the others. The result was a fairly swift turnaround with new seals and bearings and all shimmed up and painted for a not too exorbitant fee.

The ARB drop links which were too long were sent back to Steve Heath together with an original for comparison. He has since reported that with the current rose joints he cannot shorten the threaded link enough to get the right length so is sourcing a different type of rose joint. I’m waiting for an update on this so still not sure where I stand on this at the moment.
Also following on from last month’s blog, I got a new steering column bush from Adrian. It looks OK but I haven’t tried to fit it yet.
Having come to a stop on getting a rolling chassis due to the rear upright saga, I turned my attention to various other bits that would need attention starting with the hood frame. Bits of the frame were in poor condition, particulary the front cross member and the hinge plates and sockets. I decided the best thing to do was to dismantle completely and get all the metal bits powder-coated. Once I had worked out that the slotted nuts were actually locking nuts and had to be undone first, the frame came apart easily. The machine screws fit into threaded holes in the frame (via a plastic bush in most places) which allows the tension on each hinge joint to be adjusted and then locked up with the slotted nuts. The cross members welded to the side brackets were taken to the powder coaters as they were and they were quite happy to process them like that. Here’s a picture of all the small bits of the frame that I hope they masked up correctly before coating since all the small holes are threaded and all the large holes are bushed!

Although I made sketches and took a lot of photographs as I was taking it apart, I’m not looking foward to putting all this back together – good job I had a Meccano set when I was younger!
I also decided to have the hinge plates powder coated at this stage, as well as the hinge-plate sockets mounted to the tub, since both were in poor condition. The securing knobs were held captive in the socket by nuts welded to the end of the thread so to remove them to avoid them being melted in the coating process I ground off the nut and will need to weld another on once reassembled.

Next up were the seats since I could see that the frames were in bad shape so thought these were good candidates to add to the pile for powder coating. Stripping the upholstery off was a fairly simple task since the seat squab is held on with about 12 clips around the frame. The lower tension straps unhook easily and then the squab lifts off although some bits were glued to the frame and had to be peeled off. The rear frame unbolts from the base to make it easier to get the foam cushion off. This is a bit trickier to remove since the head rest needs to be removed as well as the cover and knob of the side release lever. The head rest stem has a latch spring inside which needs to be released with pliers and access is a bit of a problem. I had to reach up inside the back of the cloth to do this which is a bit of a struggle but not impossible. The major time taken in removing the rear cushion was due to it being glued to the frame almost all the way round. Eventually, the frames were bare and could be assessed for damage. The lower frame was quite rusty so decided to get it powder coated even though most of it is covered up when upholstered. The rear frame was not quite so rusty and can probably be cleaned up and painted with too much drama although some of the springs I removed looked a bit beefy and may need some trickerey to get them back in place!

I also decided to powder coat the trim panel underneath the headrest and then noticed that the chrome plating on the headrest stem might need freshening up at some stage so decided to remove it as well. The internal construction was something of a surprise since the inside seemed to be filled with chewed-up foam reminiscent of a mouse having made its nest there (unlikely but not impossible!)

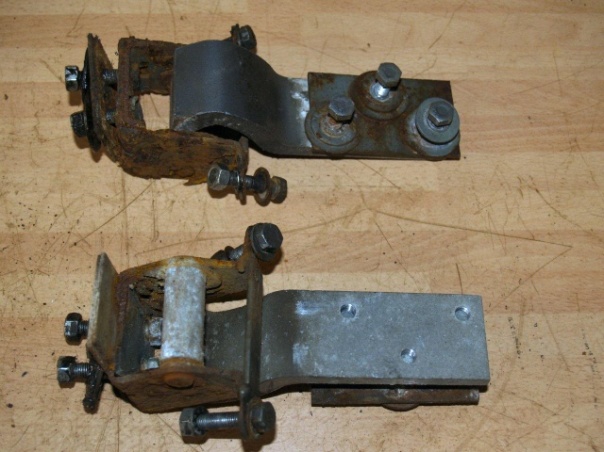
Finally, this month, I decided to take the doors off since I thought that maybe the hinges could be powder-coated in the next batch. The hinges were pretty rusty so I was expecting this to be a difficult job particularly as the hinge arms are alloy and the securing bolts steel.

However, all bolts came undone easily (that must be a first for this car!) and the doors were removed in quick time. The fixings of the hinge to the door post were protected on the inside with dum-dum and once that was all peeled off, the threads were in excellent condition and these bolts also came undone easily. Once on the bench, I decided that getting the hinge pins out would be more than my tools and resources would allow so decided to send them off to Adrian for re-bushing and coating.
So a fair bit of progress this month even if the rear uprights have delayed the move to a rolling chassis.

those mouses like the TVR-cheese