Well, the blog has been absent for the last few months but various bits of progress have been made although not really at the pace I would have liked (sound familiar?). Christmas, various family events and a winter holiday got in the way as well as a continued spell of cold wind & weather turning my car-port into an icy wind-tunnel and the garage into a deep-freeze.
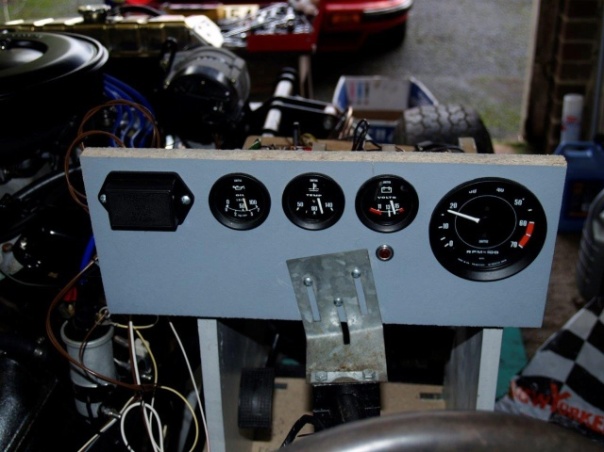
However, mustn’t grumble and with the engine back in the chassis, I spent some time putting together the other systems needed so that I could start the engine for the first time since its rebuild. This included hanging the cleaned-up exhaust system, piping up the new fuel tank, wiring up a temporary dash-board and getting the cooling system sorted. I had the radiator pressure-checked and it was fine but spent some time cleaning up the outside and straightening out some of the laminations that had been bent. A trial fill with water got as far as the water pump where water started to gush out. I thought at first that the seals had gone on the new pump but after a bit of investigation found 2 other issues. Firstly, the new pump had got an open by-pass tube (the old one was blanked off inside) and secondly, the pump was not seating properly due to it catching on a lip of the engine casting. A silicone blanking plug from ebay and re-seating the pump got me a water-tight system which was then topped up with blue anti-freeze and water. Engine oil was next (20W/50 Classic oil from Halfords) and then with the temporary electrics all checking-out it was time to fire her up!
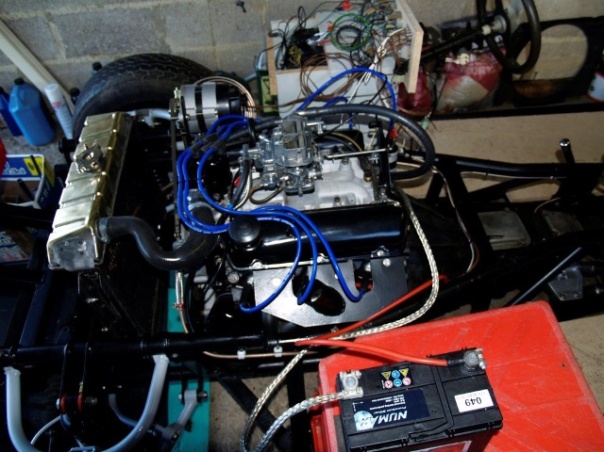
It took a while for the fuel to get sucked through the system but after several pulls, much to my astonishment and delight, she fired-up. With the exhaust only temporary, it was a bit loud and she seemed to be running a bit rough since both mixture and timing had only been set-up roughly. Once up to temperature, with the auto-choke backing fully off (another thumbs up!) it was difficult to keep the engine idling. Tweaking the timing with a strobe got it running better but then I noticed that there was a petrol leak at the carb which seemed to be coming from the accelerator pump assembly. I thought the carb had been rebuilt during the engine rebuild but if it had been then it hadn’t been re-assembled correctly. Another job to do! However, all the vital signs of health were there – good oil pressure, good battery charge and cooling system holding its pressure.
The fact that the engine starts and runs is a major milestone but there is some work still required to get it tuned up and running smoothly on idle. As well as the carb rebuild, I will need to sort the exhaust out properly since the front box pipes spacing doesn’t match the manifold down-pipes which are 10cm narrower. I’m not sure why this is particularly since the down-pipes seem pretty close to the chassis so it would be difficult to spread them out further. The solution would seem to be a new set of front box pipes so will need to measure up and see what that will cost.
As well as progress on the engine, the windscreen frame problem has progressed slightly but is not yet fully resolved. I made the decision that the correction of the angle is going to have to be made on the windscreen frame itself. In other words, I’m going to have to cut the spigots off and weld them back on at the correct angle. This allows me to get the ferrules glassed into the body so that I can finish that off ready for its respray. Glassing the ferrules in was fairly straightforward although on the nearside the original lower layer under the ferrule flange was a bit thin so I decided to cut it out and patch in a wooden support. With the wood cut to size, I bedded it in using P40 and then bedded the ferrule in on top of that, again using P40. I then put a couple of layers of matting over this and then a top layer of tissue. This will need a final application of filler to get the contour right.

With both ferrules glassed-in, I did a trial fit of the frame and it slid in without a problem. I was also able to lever the frame to see if there was any weakness in the glassing-in of the ferrules and on the contrary, the mounts were solid and the only movement seemed to be the whole of the bulkhead!
Flushed with success on this part of the bodywork, I moved on to the rear nearside which had had an argument with a Cornish wall some 30 years ago. I had “repaired” this at the time but decided to have another look at it now that I have read the book on fibreglass body repairs! Sanding back to the gel-coat I could see that although I had done a reasonable job of repair on the inside (with several layers of matting over the whole of the damaged area) the outside had been repaired with filler rather than matting or tissue and there were some gel cracks due to the impact.
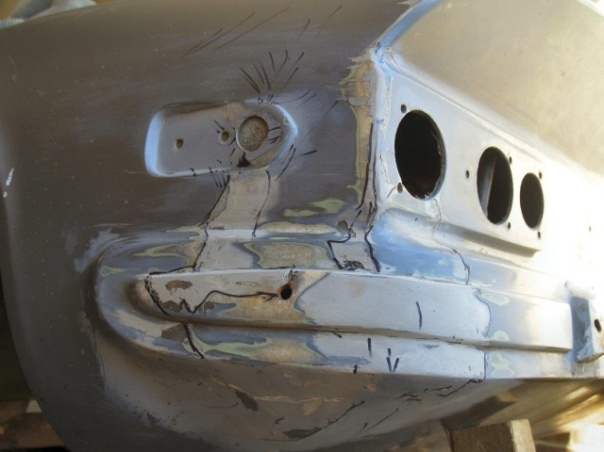
The black lines are marks I made with a felt-tip pen to show the extent of the cracks that will need grinding out and repairing with tissue – virtually the whole of the rear nearside corner!
In addition to this, there was also some surface blistering above the radio aerial where the motor had stalled and over-heated – probably not long after the wall argument. At the time, this was a lucky escape since I had parked outside the Hockey Club but came out a few minutes later for something I had forgotten to find smoke coming out of the boot. If I hadn’t come back out the car would probably have gone up in smoke! I thought that the damage could be lightly sanded and filled but once I started I realised that the resin and matting had completely lost their strength and was the nearest thing to rust-rot that I had seen in fibreglass.

To repair this I put a couple of layers of matting on the inside as well as on the outside and finished it off with a final layer of tissue.

This will need sanding down and a layer of filler to get the contour back but I’ll be doing that once I’ve got the rest of the repair work done on the nearside rear-end.

Just been reading your restoration story of the last two years. Like you I have owned a 3000s for the last 30 years. Similarly mine is in need of some TLC especially as it has covered the best part of 200,000 miles.It looks like all your hard work is coming to fruition. I was wondering as I read where you had sourced the windscreen frame. I had a replacement some years ago from David Gerald. Apparently the fabricator dropped the jig and I found that the glass did not fit in the frame as it was no longer true to the original design. Worth a check if you have not done this already.Where are you based? I am not sure I have time to bring my car back to life yet, but at some point would welcome a chat. KR Nigel
Hi Nigel, it sounds as though you have managed to get some use of your 3000S – 200,000 miles is well traveled! Mine stopped being used when I went to Germany and I never managed to get it over there so it was left to rot in my garage in the UK – scandalous really! I am down in Devon near Teignmouth so somewhat offside from the mainstream. There is quite a good community of 3000S owners that have been meeting up at the TVRCC Pre-80's meet in September usually around the Nottingham area so that may provide an opportunity to meet up.I did source the frame from David Gerald and have found that it has the wrong rake already and am suspicious of the curvature as well – see this months blog.It would be great to chat even if it's not feasible to meet up. Rather than post an email on this public blog, you can find me either on Pistonheads or the TVRCC forums as oldgeebee where you can send me a PM with contact details.Cheers,Graham
Taking notes on the engine jig as well Graham, I am going to need to do this too once I get the engine going (if…..)Matt